Are you looking to learn how to install WordPress in Hostinger? If so, you’re in luck! In this article, we’ll guide you through the steps to install WordPress in Hostinger. Whether you’re a beginner or a seasoned WordPress user, this guide will make the installation process a breeze.
Setting up your WordPress website with Hosting Auto Installer is an easy and simple process. You can install and have your WordPress site running within a few minutes. So let’s learn how to install WordPress in hostinger using Auto Installer.
Step 1 – Login & Open Hostinger Auto Installer
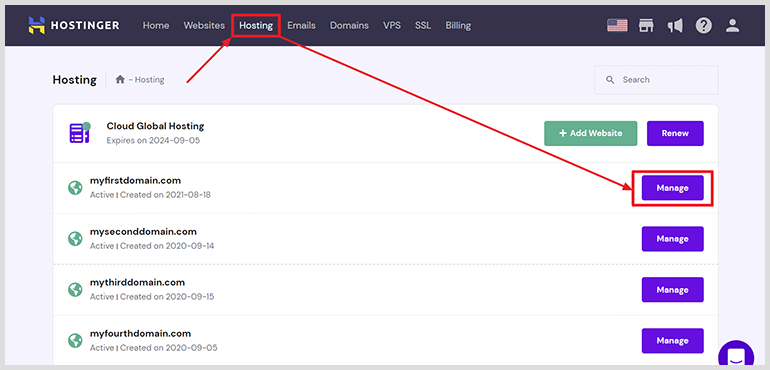
Login into your Hostinger account panel and from the top primary menu click on Hosting. Then click on the Manage button next to your preferred domain (if you’ve multiple domains):
(If you don’t have an account already, Visit Hostinger Now to create an account quickly. WPTechnic users get up to 80% discount and one free domain)
Now from the left sidebar, select “Auto Installer” under website section. Alternatively, search for Auto Installer in the search box:
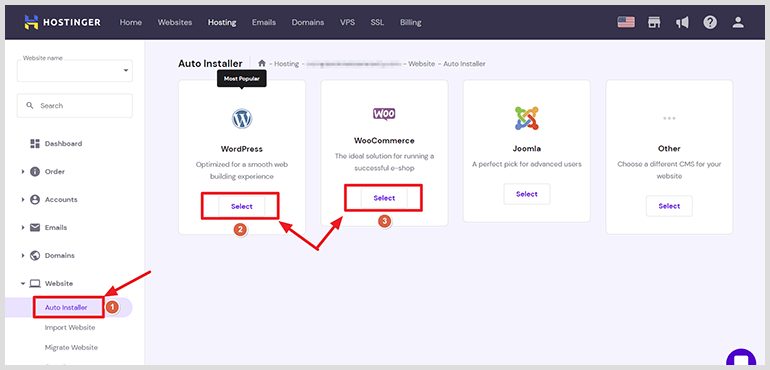
From the next page, select WordPress to setup your WordPress website. If you’re setting up an eCommerce website, select WooCommerce instead.
Step 2 – Enter the installation details
In this popup form, enter a suitable title for your website, an administrative mail, make sure that the mail is valid & active, and a username & password for login.
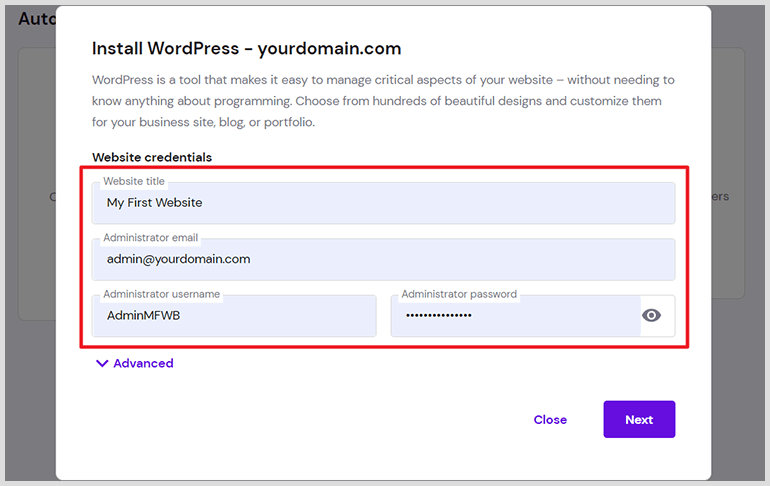
If you want to install WordPress in a custom subdirectory or subdomain, use an existing database, or setup an SSL or secure version of the website, click on the advanced button to see more options. Please note that these fields are for advanced users only and if you’re not sure what you’re doing leave all these fields as they are.
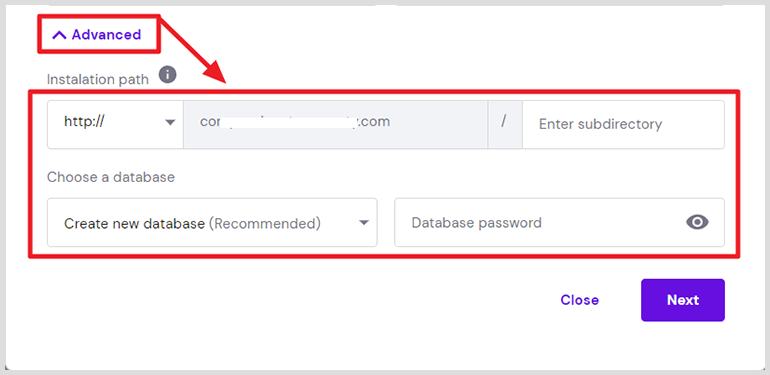
Once done, click on the Next button. From the next page, select the application version (it’s better to go with the latest version), the default language for your WordPress website, and choose an option for update settings.
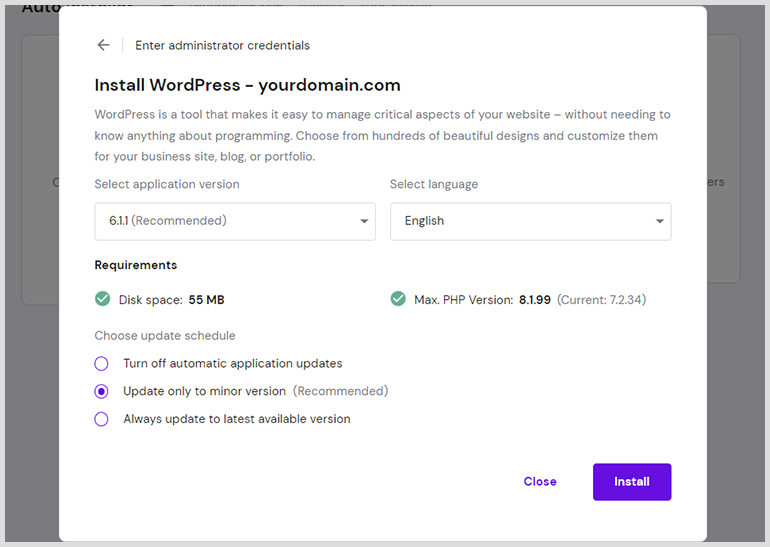
Once done, click on the Install button to install WordPress or WooCommerce for your website.
That’s it! You have successfully installed WordPress or WooCommerce for your website using Hostinger Auto Installer.
Step 3 – Access WordPress Dashboard
As the installation process is completed now, you may visit your website now at yourdomain.com. You will be able to manage your website via WordPress administrative area. To do that, visit youdomain.com/wp-admin and login using your administrative email/username and password.
You can also click select WordPress > Dashboard from the left sidebar and then click on the “Edit Website” button to login to your WordPress administrative area directly.
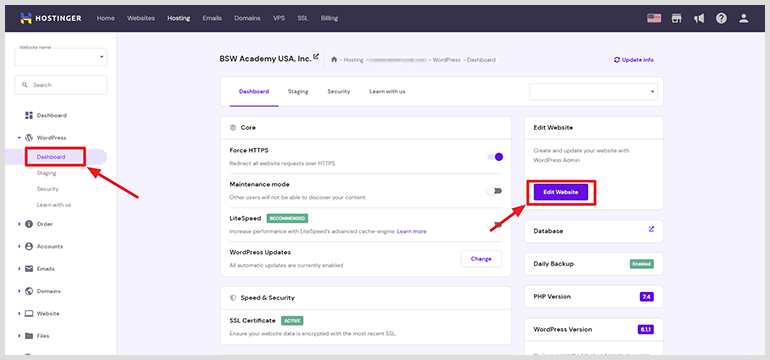
If you don’t see any changes on your website after the successful installation and your domain is showing a default page by Hostinger, make sure to clear the browser cache.
Conclusion
That’s it. You have learned the simple and straightforward process of how to install WordPress in Hostinger. With these easy-to-follow steps, you can have your WordPress site up and running in no time. Happy blogging!

