Is your WordPress site vulnerable to hacking attempts? If you’re still using the default admin login URL, the answer is a resounding yes.
In this step-by-step guide, we will walk you through the process of securing your WordPress site by changing the admin login URL.
So, let’s dive in and take the necessary steps to fortify your WordPress site against cyber threats.
Changing WordPress Default Admin Login URL
Now that we understand the default admin login URL and its potential vulnerabilities, let’s proceed with the steps to change it.
Step 1: Installing Hide My WP Ghost plugin
There are several plugins available in the WordPress plugin repository that serve the same purpose. However, for this tutorial, we will be using the popular “Hide My WP Ghost” plugin.
👉 If you don’t know how to install a plugin, please read our tutorial on how to install WordPress plugins to do it in the RIGHT way.
Installing a security plugin like Hide My WP Ghost is essential for protecting your WordPress site against various threats, including brute force attacks, malware infections, and unauthorized access attempts.
Step 2: Enabling the custom login URL feature
After installing and activating the Hide My WP Ghost plugin, the next step is to enable the custom login URL feature. This feature allows you to change the default admin login URL to a custom URL of your choice.
To enable the custom login URL feature in Hide My WP Ghost Security, follow these steps:
- In your WordPress admin dashboard, navigate to “Hide My WP” > “Change Paths”.
- From the next screen, click on “Lite Mode” and then continue to enable the lite mode functions.
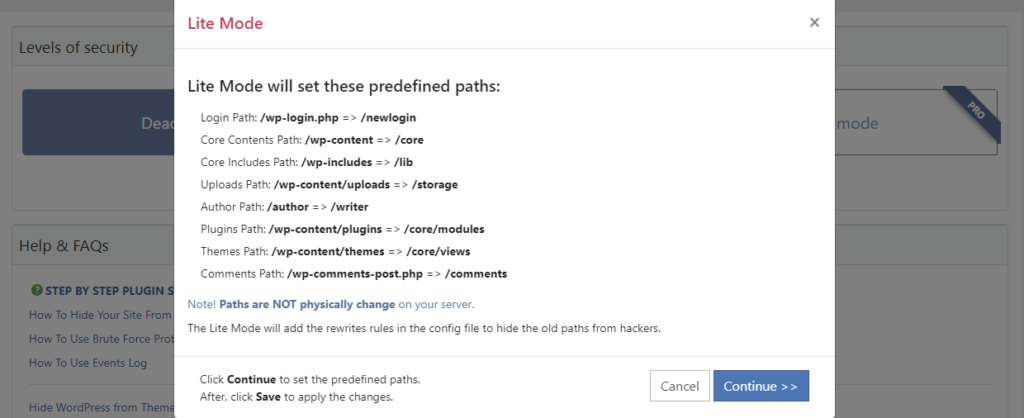
This by default will set certain predefined custom paths as you can see in the screenshots above.
Step 3: Setting up a custom login URL
Enabling the custom login URL feature is a crucial step in securing your WordPress site. Once this feature is enabled, you can proceed to set up a custom login URL.
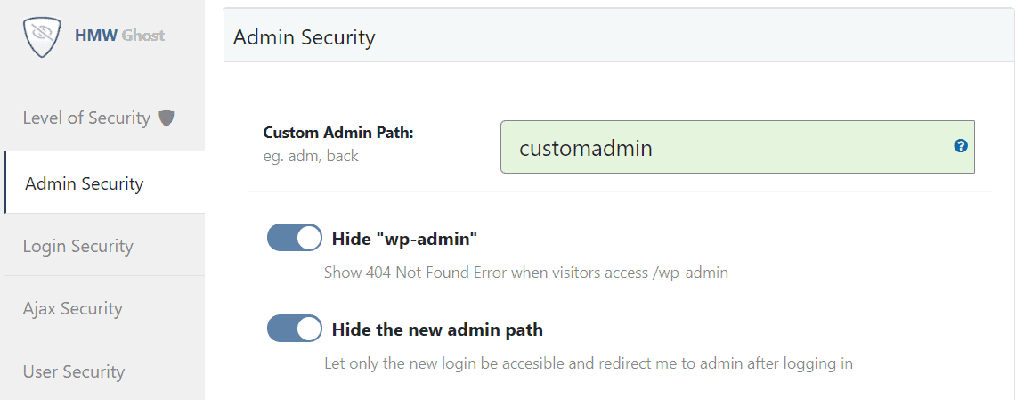
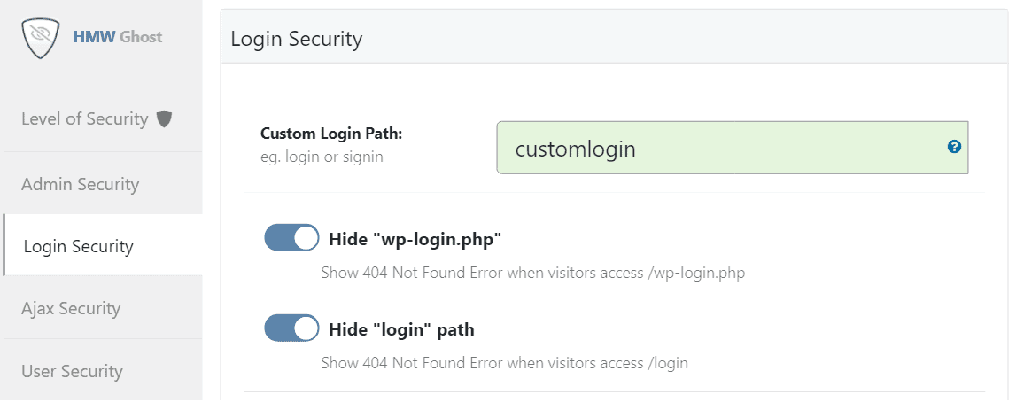
- Now from the left side menu, click on “Admin Security” and “Login Security” to set your own custom path for the admin and login URLs.
When choosing a custom login URL, it’s important to pick something unique and difficult to guess. Avoid using common words or phrases and consider using a combination of letters, numbers, and special characters.
Once you’ve entered your custom login URL, click the “Save Changes” button to apply the settings.
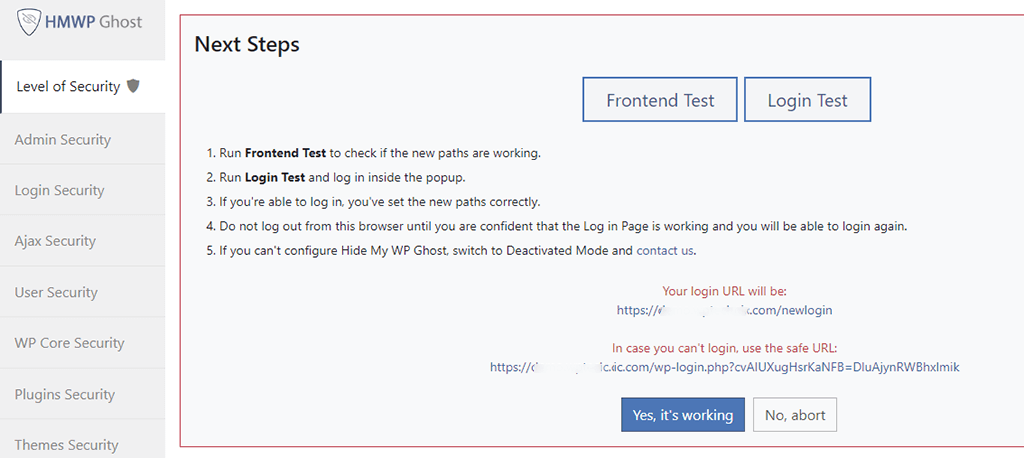
⚠️ Make sure to copy the safe url and keep it safe somewhere. In case you can’t log in to the website, simply use the URL to override the deactivate the plugin settings and enable safe mode.
Congratulations!
You’ve successfully changed the default admin login URL and set up a custom login URL for your WordPress site. By implementing this security measure, you’ve significantly enhanced the security of your site and reduced the risk of unauthorized access.
Step 4: Testing the new login URL
After setting up a custom login URL, it’s necessary to test the new URL to ensure it’s working correctly. Testing the new login URL will also help you verify that the custom URL is providing the expected level of security.
To test the new login URL, open a new browser tab or window and visit the new login URL and then log in to your dashboard.
📢 Get the Hide My WP Ghost Pro to enable more security features. You may also read our review about this plugin here.
While changing the admin login URL is an important step in securing your WordPress site, there are other security measures you should consider implementing to further enhance the protection of your site.
By implementing these additional security measures, you can further fortify your WordPress site and reduce the risk of security breaches.
Common mistakes to avoid when changing the admin login URL
While changing the admin login URL is a relatively simple process, there are some common mistakes that you should avoid to ensure a smooth transition. Here are a few mistakes to watch out for:
- Forgetting the custom login URL: After changing the admin login URL, it’s essential to remember the new URL. Make sure to note it down in a secure location to avoid being locked out of your own site.
- Using easily guessable custom URLs: When setting up a custom login URL, avoid using URLs that are easy to guess or related to your site’s content. Using a custom URL like “my-login-page” or “admin-login” defeats the purpose of changing the admin login URL and makes it easier for attackers to find.
Conclusion
By changing the default admin login URL, you can significantly reduce the risk of unauthorized access, brute force attacks, and potential data breaches.
In this step-by-step guide, we’ve walked you through the process of securing your WordPress site by changing the admin login URL.
Let me know your experience by leaving a comment below right now.

