In this tutorial, I will walk you through to learn how to install WordPress in cPanel. It requires no advanced skills and takes only a few clicks to make the site up and running.
Popular WordPress hosting companies usually offer you to install WordPress in cPanel using automated app installers like Softaculous, QuickInstall, or Fantastico.
If for any reason you cannot Install WordPress using cPanel, this tutorial covers how to install WordPress on any hosting using any available methods.
So, How to Install WordPress in cPanel?
cPanel is a very known control panel system offered by many hosting providers. cPanel comes with many automation tools and applications designed to simplify the process of hosting and developing your website.
cPanel also comes with built-in tools for installing WordPress with a single click. Hosting companies select which auto-installer tool they want to offer for their users.
The popular cPanel based auto-installer are Softaculous, QuickInstall, and Fantastico. Your hosting may offer one of them.
Let’s see how to Install WordPress in cPanel using all those three aut-installer tools.
Installing WordPress in cPanel using Softaculous
Softaculous is a popular cPanel based auto-installer application that automates the process of installing the web application. Many hosting companies will offer you to install WordPress in cPanel using Softaculous.
Step 1. Open Softaculous App installer
Login to your cPanel by visiting yourdomain.com/cPanel and find the Softaculous installer. Depending on your hosting, the Softaculous app may have under any section.
For example, you will find Softaculous under the ‘Autoinstallers’ section in Siteground hosting, under ‘Exclusive for Namecheap customer’ in Namecheap hosting, under the ‘Software’ section in Inmotionhosting.


Click on Softaculous App Installer.
Step 2. Select WordPress
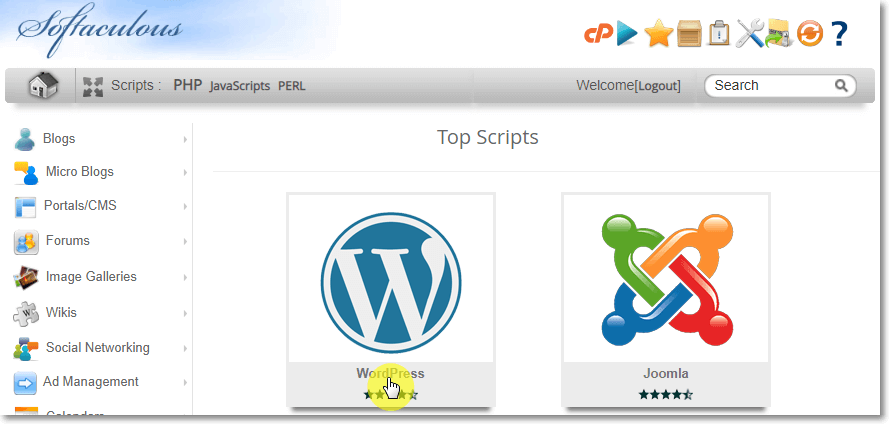
You will be redirected to the Softaculous home page where you will see a list of web applications. Click on the WordPress icon.
Step 3. Installing WordPress
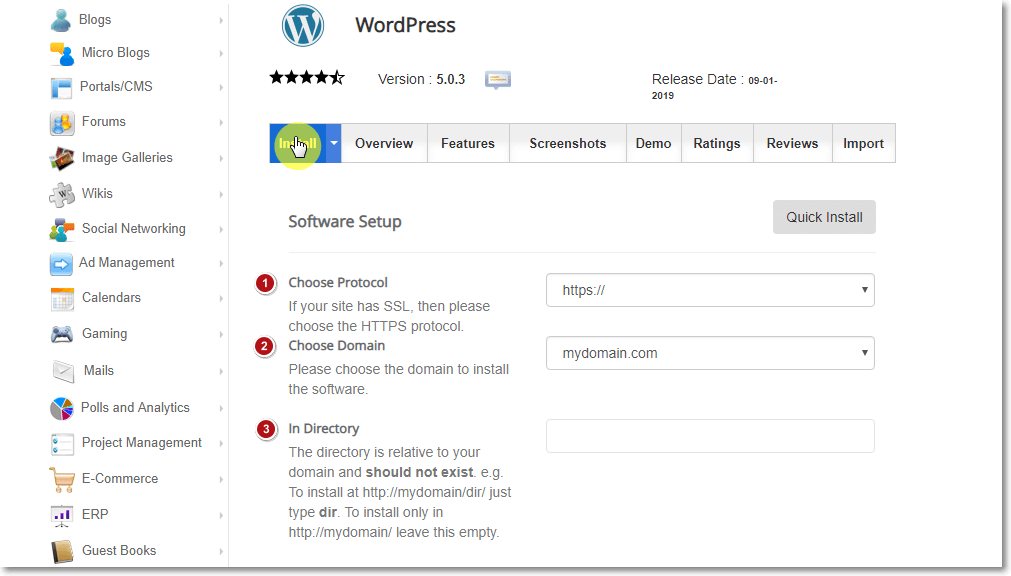
On the next page, click on the Install tab from the menu bar. Now you need to provide some details for your WordPress installation.
Software Setup
1. Choose Protocol: If your site has SSL (Secure Sockets Layer), then please choose the HTTPS protocol. Otherwise, leave it as
2. Choose Domain: If you have multiple domains registered/DNS pointed to this hosting, you can choose the domain to install the WordPress.
3. In Directory: If you are installing WordPress for your main domain, leave it empty. If you want to install it for any subdirectory, for example, yourdomain.com/blog, then simply type “blog” in this field.
Site Settings

1. Site Name: Type your website’s title here.
2. Site Description: Provide a catchy slogan or short description of your website/business.
3. Enable Multisite (WPMU): This feature will enable the multisite option for your WordPress blog.
Admin Account

Enter admin username, password, and email to create an account on your WordPress with an Administrative role.
Choose Language

Here you can select the language for your WordPress site. You can select your preferred language among over 35 languages supported by WordPress.
Note that, this language is used to display the WordPress administrative “back-end” in your language, not the content of your site. You can change it later anytime you wish from your admin panel.
Advanced Options
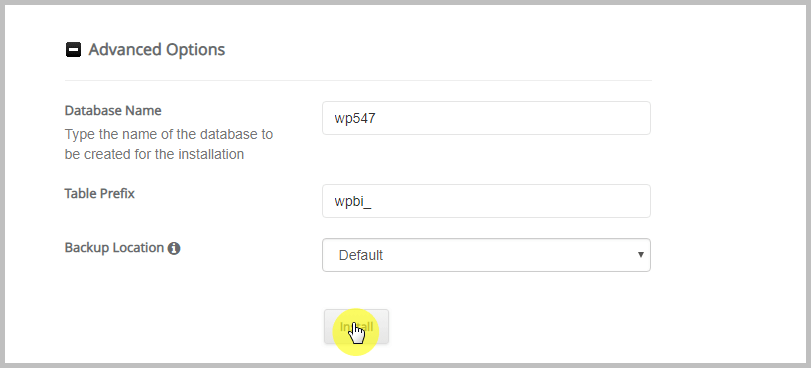
By default, this option is hidden. You can customize your Database name, Table prefix, and Backup Location here.
Click INSTALL.
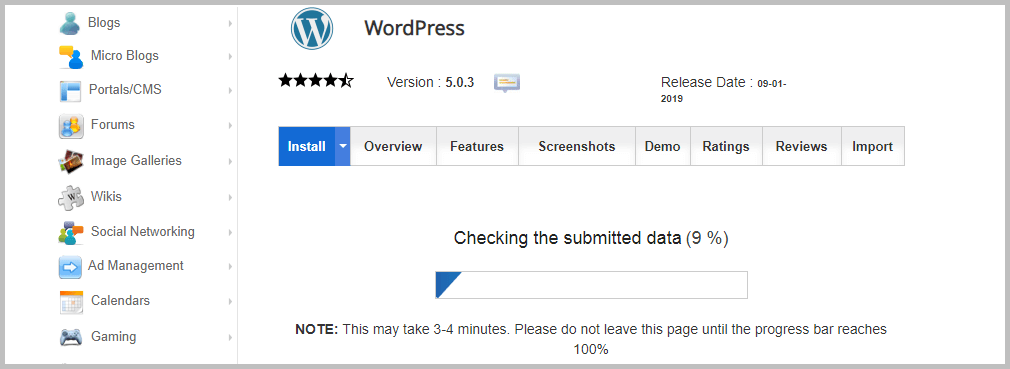
Softaculous will now check your submitted data and start the installation process. This may take 3-4 minutes only to finish the process and you shall not close or refresh the current window in the meantime.
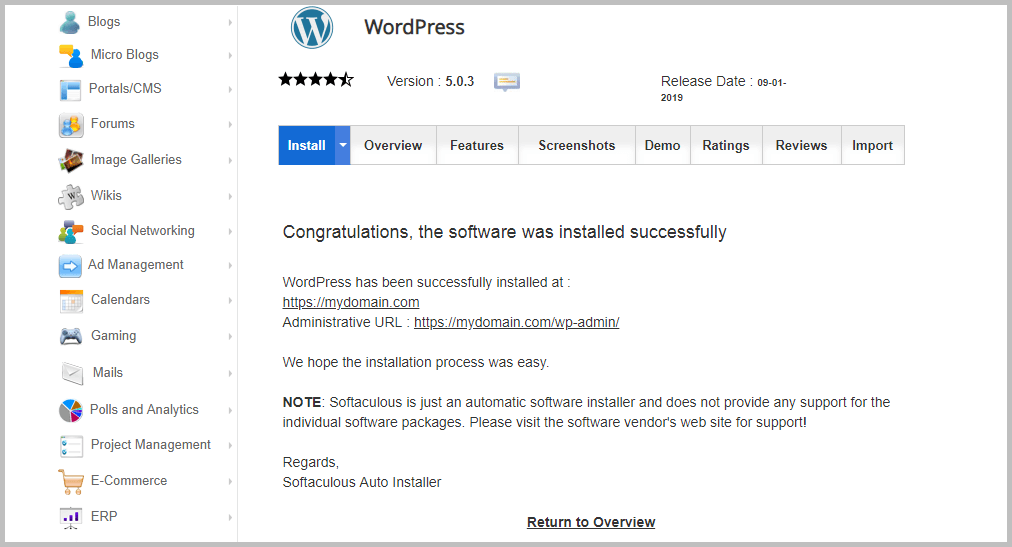
Congratulations, WordPress has been successfully installed for your website. You will get the Administrative URL for your website here which is by default youdomain.com/wp-admin.
You can now go ahead, click on Administrative URL and log into your WordPress admin area and start creating your first post. You can also click on ‘Return to Overview’ to see the overview of your Installation.
That’s all. You’re DONE with learning how to install WordPress in cPanel using Softacolous.
Did I cover all the steps properly? Or I missed anything? How you are going to install WordPress for your site, Manually or using Softacolous? Let me know by leaving a comment below right now.

